Today, I am going to write a basic introduction to Github, not just for programmer but also for digital humanists. We have seen Github pages several times either in class activity or during the homeworks. As a strong advocate of the necessity of programming for digital humanist, I think it is necessary to learn how to use Github since it is also used as a collaborative project management tool even for general purposes. The biggest advantage of Github is that it manages the version of project. It is important to save each versions of project whenever some kind of change was made, and Github does that for us to keep track of the changes and intervenes when there is any conflicts during the collaboration.
Now, let’s figure out how to use Github.
First, we have to sign up or sign in to Github. You can click the options with red box. The sign up process will require email and human verifications (clicking images).

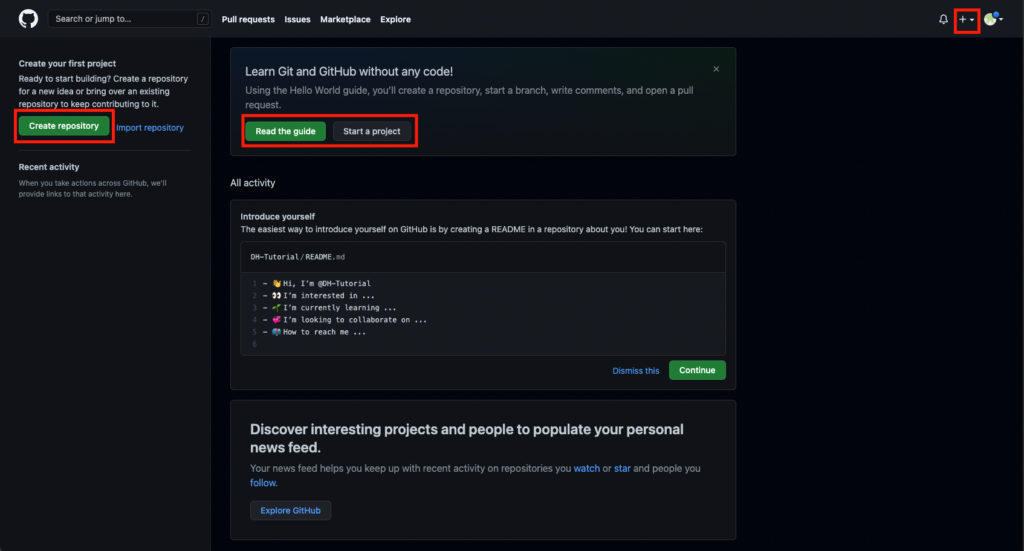
Once you create your account, you will see the main page looking like this. It’s always a good idea to read the guide, but for this post I am going to show you how to create a repository to start a project. Now, click Create repository button (this can be found in any of the red boxes).
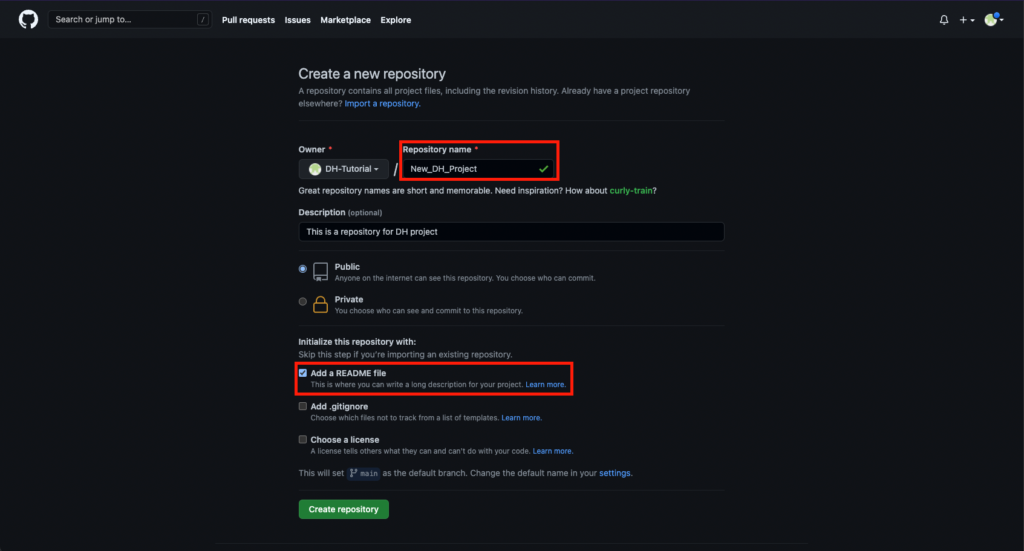
To create a new repository, you have to name the repository and can add some descriptions to introduce what this project is about. You can also set the privacy level by selecting public or private, which will grant permission for this repository only to selected users. Also, it is better to have a README file. This will be shown in the main page as a main document. Then, click Create repository and you are all set for the repository!
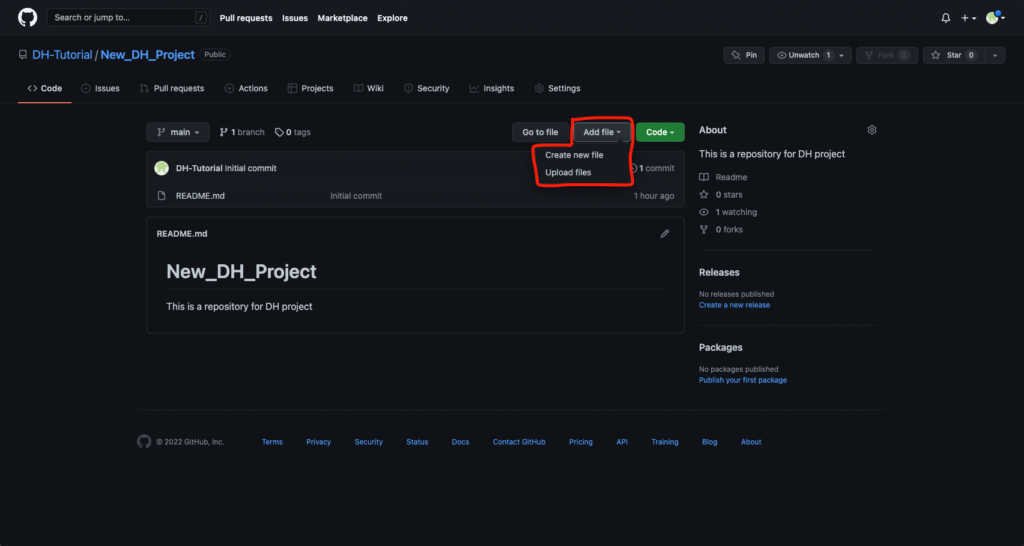
Then, you will be redirected to the main page of the repository you just created. Now, you have several options to develop this project. First, you can directly create or upload new file in the repository. If you’re only adding new files or not doing works related to programming, this still might be useful. However, the better way to use Github is cloning the current repository into local computer and pushing the updates to Github whenever you need.
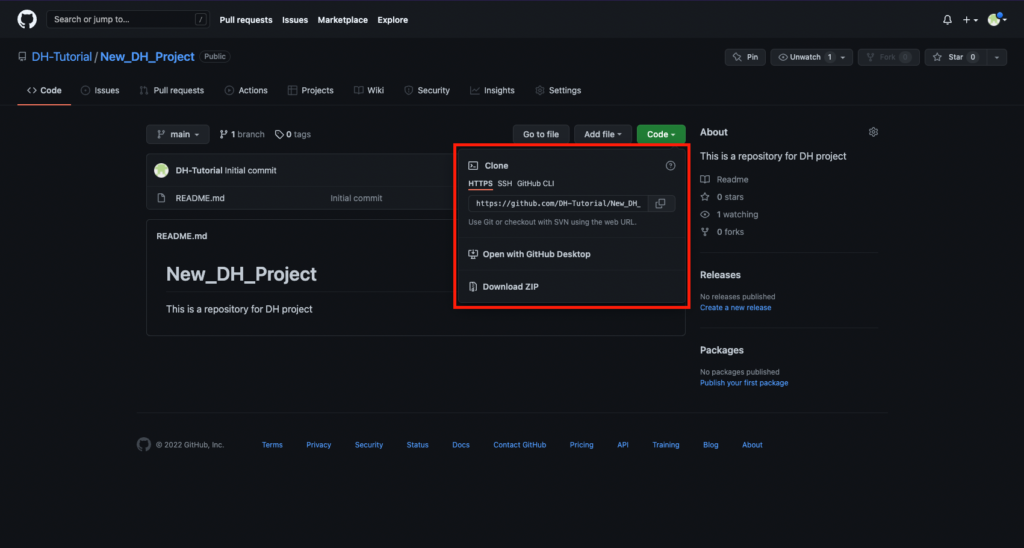
Next to Add file button, click Code and you will see several options to clone. Copy the link at the first option (make sure it is HTTPS).
Now, we are going to get into the coding part! First, open the terminal from your computer.
If you want to learn how to navigate folders on a terminal, this link would help you.
To clone our repository, we are going to use git clone command. Git is an open source version control system that enables us to manage the updates and the versions of collaborative works. Like the image below, type git clone copied-repository-link and you will see the folder in your computer.

Now you can make any changes in your local and send the changes to the server later. If your collaborators make any changes, you can pull the changes and update your local repository. For this tutorial I just going to make a little change (Hello World!) in README.md.

Once you made some changes, you are ready for pushing your changes to the Github repository.
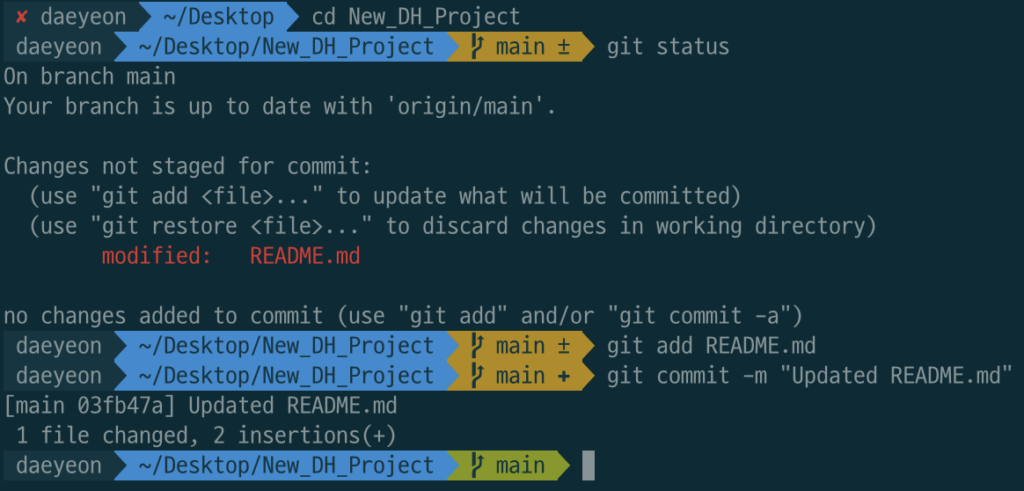
When you go into the repository on terminal and type git status, this will show all the changes made so far.
First, type git add filename to add your changes: in this case it will be git add README.md .
Then, type git commit -m "your commit message" to add a brief description of your change.
Finally, you are going to push your commit by doing git push . This will require verifying your Github email and password. Then, you will probably encounter this message saying that you have to set up a personal access token for safety purpose. The guide for creating a PAT is here (while setting up your PAT, you should save your token somewhere since you won’t be able to see it on Github next time!). Once you set it up and try git push again, you will type your email and then PAT for the password. Now it works!


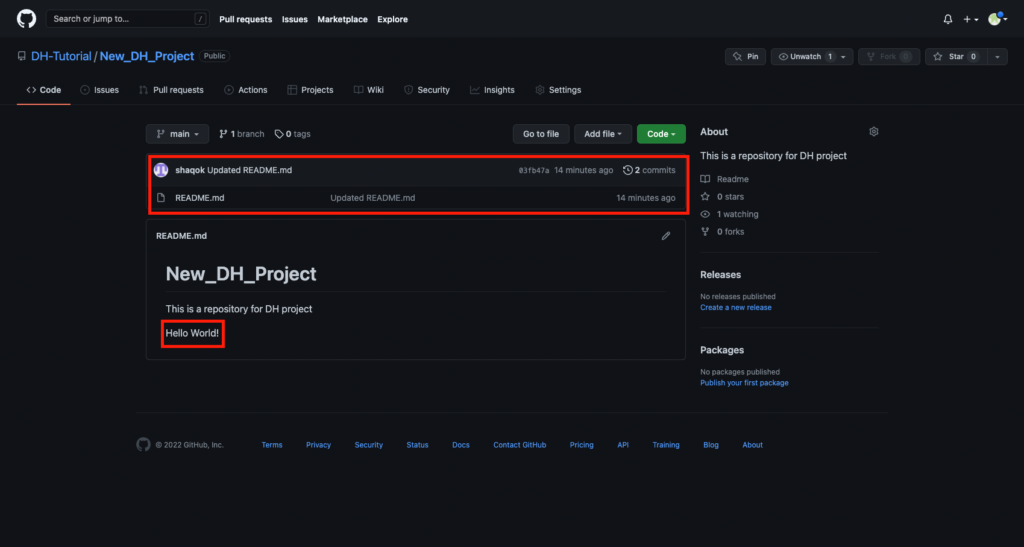
Let’s check our main page of the repository. The first red box shows the recent update, and you can also see the change made in the README.md.
So, this was a brief guide of Github (and little bit of Git). I also found this tutorial was useful, so if you want to explore more, this would be helpful. I personally think Github would expand its usage from programmer’s side to much wider fields. Even now, Github supports project management feature to facilitate the development process and this helps to connect every aspects of the process among the collaborators. I hope this was useful tutorial to Github and I’m looking forward to seeing more DH projects on Github!
Hi Daniel, this is such a thorough and clear tutorial. I think you chose a very useful topic to make a tutorial about, because we have downloaded a lot of content for our projects in this class from Github, but we’ve never talked about how it works and how to create a repository for information that you want to share on this platform.